by Xpressley Bookkeeping | Jan 3, 2023 | Bookkeeping News, Quickbooks Online, Quickbooks Training
How QuickBooks Can Get Your Finances In Order for 2023 Put 2022 behind you by wrapping up those unfinished accounting tasks in QuickBooks. You meant to clean up your accounting data by the end of 2022, but December is so busy. It was hard to do much beyond managing...

by Xpressley Bookkeeping | Jan 2, 2023 | Bookkeeping News, QuickBooks Desktop, Quickbooks Training
If you haven’t checked out QuickBooks Online free mobile app, you might be surprised at how much it can do. There was a time when leaving the office meant you were done with work for the day. These days, many homes are the office. And easy mobile access has made it...
by Xpressley Bookkeeping | Aug 23, 2022 | Quickbooks Training
Now that you’ve created some Items and Jobs in QuickBooks, what can you do with them? Last month, we talked about creating Item and Job records in QuickBooks. You can think of a Job as a project your company is doing for a customer, like a marketing campaign or a...

by Xpressley Bookkeeping | Mar 13, 2017 | Bookkeeping News, Quickbooks Training
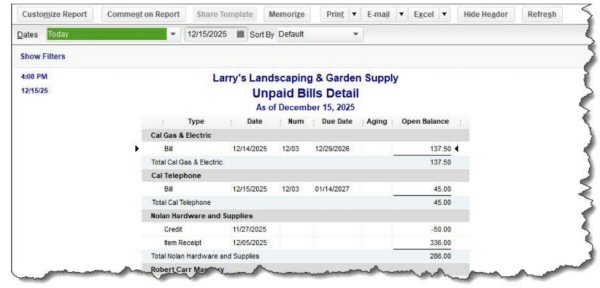
Did you resolve to pay bills on time in 2021? Here’s how QuickBooks can help. Managing your paper bills manually is a dangerous practice. It’s too easy to lose them, for one thing, and it’s impossible to keep all of those vendors and amounts in your head. Even if you...

by Xpressley Bookkeeping | Mar 13, 2017 | Bookkeeping News, Quickbooks Training
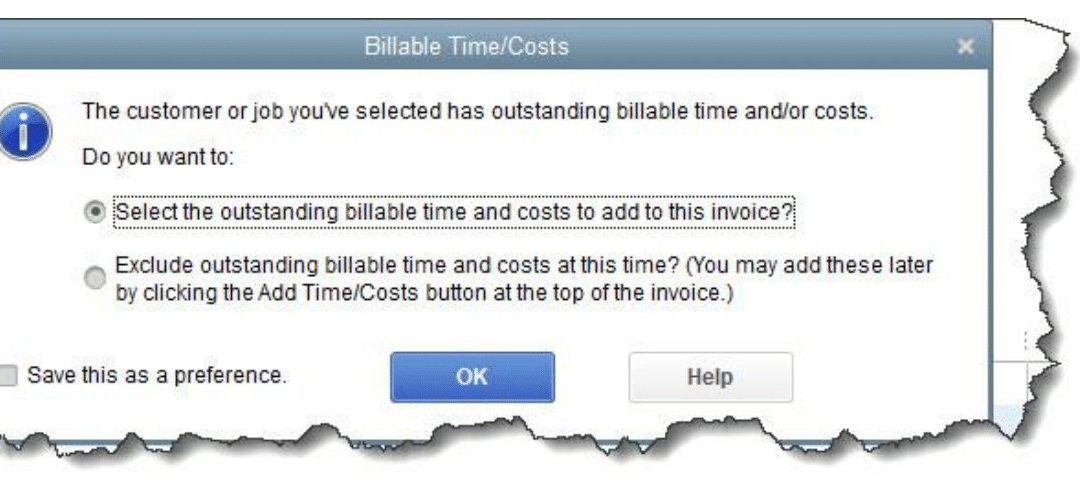
Sometimes, you have to spend money on your customers. Make sure you’re billing them for it.Usually, money flows from your customers to your business. But there may be times when you have topurchase items for a job whose costs will eventually be reimbursed. Or you, or...

by Xpressley Bookkeeping | Mar 13, 2017 | Bookkeeping News, Quickbooks Training
In these days of supply chain issues, you need to keep track of your vendors. QuickBooks has this covered. If you buy and resell products, or if you need to purchase materials to create your own items, good management of your company’s vendor records is critical....